
Have you been thinking about upgrading your home espresso setup with the Cuisinart Espresso Bar™ Espresso Machine?

This image is property of Amazon.com.

Overview of the Cuisinart Espresso Bar™ Espresso Machine
I unboxed and used the Cuisinart Espresso Bar™ Espresso Machine over several weeks so I could speak to both the short-term thrills and the day-to-day realities. This machine aims to combine accessible usability with a few features that let me push for better shots, like 20 bars of pressure and a 54 mm stainless steel bottomless portafilter.
What I noticed right away
The machine has a confident footprint and a front-loaded, removable water reservoir that I appreciated during setup. Its combination of a steam wand and a cold extraction option made it obvious that Cuisinart intended this unit to handle both hot milk drinks and refreshing cold beverages.
Key Features and Quick Breakdown
I like to see the essentials at a glance, so I put together a simple breakdown to highlight what matters most about this espresso machine. Below I summarize the major specs and how they translate into real use.
| Feature | Details | Notes |
|---|---|---|
| Pressure | 20 bars | High pressure rating that supports balanced extraction when grind, dose, and tamp are correct. |
| Portafilter | 54 mm stainless steel bottomless | Bottomless portafilter gives visual feedback on extraction; use finely ground beans and consistent tamping. |
| Cold Extraction | Yes | Dedicated cold extraction mode for iced and cold beverages. |
| Steam Wand | Yes, manual steam/frothing wand | Good for milk-based drinks; skill needed to texture milk properly. |
| Water Reservoir | Removable, front-loaded 48-oz with viewing window | Easy to refill and monitor water level; large enough for multiple drinks before refilling. |
| TIP provided | Use finely ground espresso beans; dosing and tamping guidance included | Important operational tip to reduce splashing and improve shots. |
Why these features matter to me
The 20-bar rating paired with a bottomless portafilter means I can see exactly how the shot extracts and make adjustments. The removable 48-oz reservoir and front access make daily use and maintenance less of a chore for my routine.
My First Impressions of Build and Design
I found the machine to feel solid and purposeful on my counter without being overly large or heavy. The controls are straightforward, and the viewing window on the reservoir is a small design choice that made water checks effortless.
A few aesthetic and practical notes
The exterior is clean and modern, fitting into most kitchen styles without shouting for attention. Practical elements like the front-loaded reservoir and the accessible drip tray showed that usability was part of the design conversation.
Setup and First Use
Setting the machine up took me less than 20 minutes from unboxing to first rinse cycle when I followed the quick-start instructions. I appreciated the removable reservoir because it made filling with filtered water simple and spill-free.
What I did step-by-step
I placed the machine on a flat surface, removed protective packaging, filled the reservoir with cold filtered water, and ran a water-only cycle through the group head to prime the pump and flush any residues. After that, I warmed up the portafilter and performed a blank shot to stabilize temperature before pulling my first espresso.

This image is property of Amazon.com.
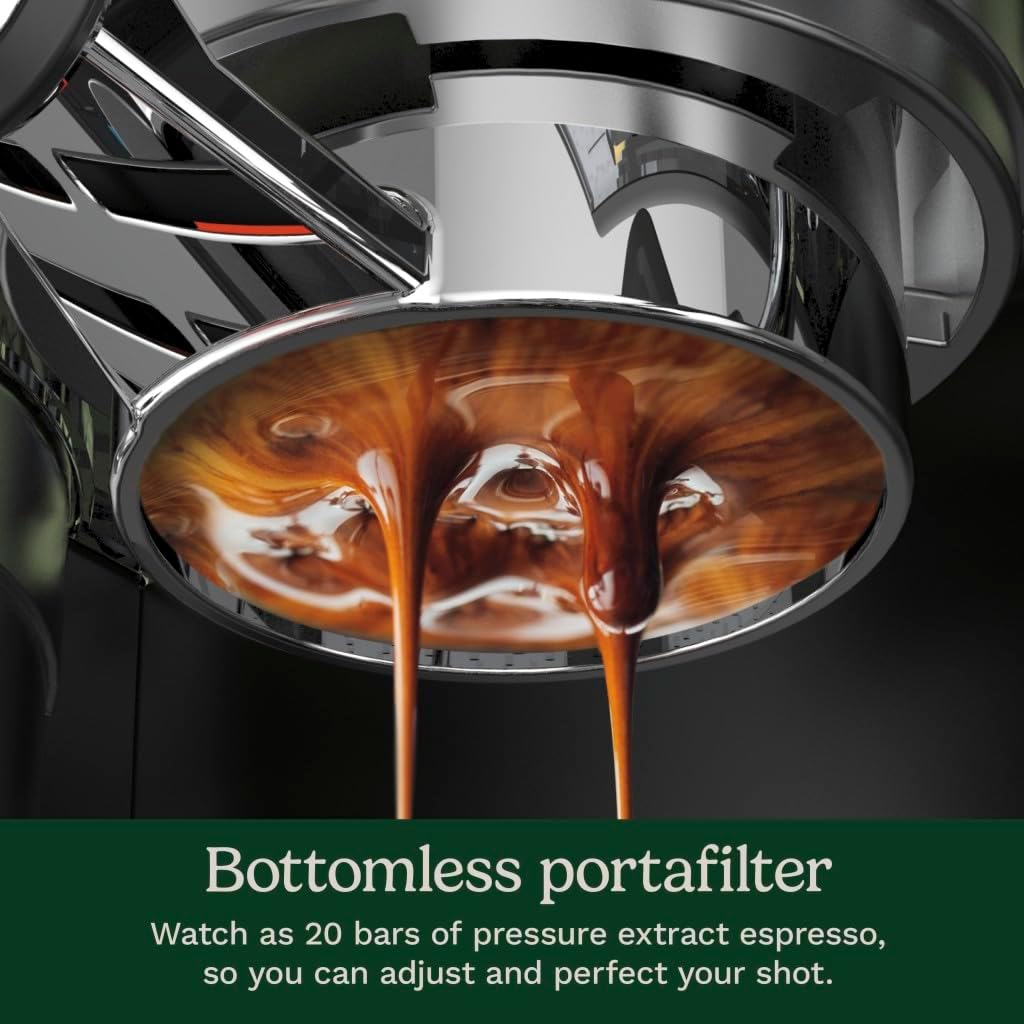
Portafilter and Extraction Experience
The 54 mm stainless steel bottomless portafilter is a highlight because it shows the flow pattern of the espresso and exposes channeling or uneven tamping immediately. I quickly learned that bottomless extraction rewards careful dosing, grind size, and a level tamp.
Important TIP for consistent extraction
TIP: Please use finely ground espresso beans for the bottomless portafilter. Too much or too little coffee in the portafilter not tamped evenly can cause splashing during extraction. Use 2 scoops for single and 3 scoops for double espresso and tamp with moderate force for best results. I followed that guidance and saw a notable reduction in splashing and more consistent shot color and flow.
Dialing In: Grind, Dose, and Tamping
I spent the better part of a morning dialing in my grind and dose for this machine, and I found that small adjustments made a big difference. Because the 20-bar pump is capable, the limiting factors are consistently the grind and tamp rather than machine pressure.
How I adjusted for better shots
I started with a fine espresso grind and used the recommended scoop counts—2 scoops for single and 3 scoops for double—then adjusted by modifying grind size in small steps. For tamping, I used a moderate force and made sure the puck was level; consistent tamping removed most of the spurting and channeling I initially experienced.

This image is property of Amazon.com.
Cold Extraction Feature: Making Iced and Cold Drinks
One of the most interesting features for me was the cold extraction mode, which gave me a cleaner, less acidic iced espresso profile that I preferred for cold drinks. It’s a welcome addition because it means I can get chill-friendly extraction without needing to dilute hot espresso with lots of ice.
How I used cold extraction
I used the cold extraction setting with finely ground coffee and slightly extended extraction times to compensate for lower temperatures, and I found the results made for smoother iced lattes and sparkling espresso drinks. The cold option works best with strong concentration and a taste for bright, refreshing cold beverages.
Steam and Frothing Wand: Milk Texture and Technique
The manual steam/frothing wand is responsive and lets me microfoam milk when I take the time to position the tip and control steaming. I had to practice the angle and depth to get glossy microfoam suitable for lattes and silky foam for cappuccinos.
What I learned about texturing milk
The wand produces consistent steam power that lets me aerate quickly then stretch and polish milk to a smooth texture. If I want latte art, I need to pay attention to jug size, milk temperature, and the timing between steaming and pouring.

This image is property of Amazon.com.
Water Reservoir and Accessibility
The removable, front-loaded 48-oz water reservoir with a viewing window is one of my favorite convenience features because refilling and checking water levels are straightforward. The size meant I could make several drinks in a row without refilling, which is great when I have guests.
Maintenance convenience
Because it’s removable, I can rinse and clean the reservoir easily, and the viewing window prevents surprises when I’m mid-brew. I recommend using filtered water to reduce scale buildup and keep flavors clean.
Performance and Taste: What the Espresso Actually Tastes Like
Once I dialed in the grind and dose, the shots produced by this machine were balanced and had a satisfying crema when ground and tamped properly. The 20 bars of pressure can support excellent extraction, but the final flavor hinges on my input—my grind, dose, and tamp.
Notes on flavor characteristics
When I used freshly roasted, well-rested beans and a fine grind, I got rich, complex shots with bright top notes and a smooth finish. Under-extracted or poorly tamped shots produced sourness or thin crema, so I learned to be methodical with preparation.

This image is property of Amazon.com.
Shots, Consistency, and Temperature Stability
Shot-to-shot consistency improved for me after the machine warmed up and after I standardized my routine for dosing and tamping. Temperature stability was decent once the machine had been on for a short time, and I found it helpful to preheat the portafilter before pulling shots.
How I improved consistency
I let the machine warm for about 15 minutes before serious pulling, preheat the portafilter with a blank shot, and rinse the group head between shots to stabilize temperature. These small rituals improved extraction consistency and the flavor profile across multiple shots.
Cleaning and Descaling: Routine Care
Daily cleaning involved wiping the group head, purging the steam wand after each use, and emptying the drip tray. Weekly care included removing and rinsing the portafilter and soaking removable parts if needed; I also checked the reservoir for any build-up.
Descaling schedule and recommendations
I used a commercial descaler according to the frequency recommended by the manufacturer based on my water hardness, which generally meant every few months with filtered water and more frequently with hard tap water. Descaling kept heating performance stable and reduced mineral-related taste issues.
Accessories and What I Received
The standout accessory is the 54 mm stainless steel bottomless portafilter, and my unit’s removable reservoir made maintenance feel simple and user-friendly. Other included accessories can vary by retailer, so I checked the box contents for tamper or filter baskets when I purchased mine.
Practical accessory tips
If a tamper isn’t included, I recommend getting a 54 mm tamper to match the portafilter and improve tamp consistency. A distribution tool can also help if you struggle with even coffee distribution before tamping.
Pros and Cons
I like to balance enthusiasm with practical drawbacks so buyers know what to expect. Here are the strengths I found and a few limitations I encountered during my testing.
Pros
- The bottomless 54 mm portafilter provides excellent visual feedback for dialing in shots.
- Cold extraction is a helpful feature for iced and cold drinks.
- Removable 48-oz front-loaded reservoir is convenient and easy to refill.
- Steam wand gives me control to texture milk for a variety of milk-based drinks.
Cons
- Bottomless portafilter demands careful dosing and tamping to avoid splashing; it’s not as forgiving for beginners.
- Manual steam wand requires practice to master milk texture and temperature control.
- Some initial warm-up time is needed for the machine to stabilize for consistent shots.
Who This Machine Is For
I think this machine suits someone who wants more control than a capsule machine offers but doesn’t want to step into full prosumer territory. It’s ideal for people who enjoy the ritual of making espresso and want to learn skills like dialing in grind, tamping, and milk texturing.
Who might hesitate
If you prefer a completely hands-off experience or want instant cafe-level latte art without practice, this might not be the best fit. The bottomless portafilter rewards skill development, so it’s best for someone willing to refine their technique.
Tips for Best Results
I developed a short checklist that helped me get consistently better shots from this machine. Small habits made the biggest difference in terms of flavor and extraction reliability.
My practical checklist
- Always use freshly roasted beans and grind just before brewing.
- Follow the provided TIP: Please use finely ground espresso beans for the bottomless portafilter. Too much or too little coffee in the portafilter not tamped evenly can cause splashing during extraction. Use 2 scoops for single and 3 scoops for double espresso and tamp with moderate force for best results.
- Preheat the portafilter and run a blank shot to stabilize temperature before pulling a real shot.
- Purge and wipe the steam wand immediately after use to prevent milk residue build-up.
Troubleshooting Common Issues
I had a few common hiccups early on and learned to address them quickly with a few checks and adjustments. Most issues trace back to grind size, tamping, or inconsistent maintenance.
Common problems and fixes
- Splattering from the bottomless portafilter: Check dosing and tamping; overly coarse or uneven tamping commonly causes this.
- Thin crema or weak shots: Grind finer, increase dose slightly, and ensure the machine is warmed up.
- Steam wand sputtering: Purge the wand, check for milk build-up at the tip, and ensure adequate steam pressure by allowing the boiler to recover between steaming.
Advanced Tips for Latte Art and Milk Texture
Once the basics were consistent, I practiced steaming and pouring to improve milk texture for basic latte art. Patience and practice made the biggest difference in my results.
Steps I followed for better microfoam
I used a chilled pitcher, poured enough milk for one drink, and started with the tip just below the surface to incorporate air briefly. Then I submerged the tip deeper to heat and polish the milk, aiming for about 140–150°F for lattes and slightly hotter for cappuccinos.
Recipes and Drink Ideas I Enjoyed
I experimented with a few classic recipes and adapted them to the machine’s strengths, particularly the cold extraction feature. Below are a few formulas I used and refined as I became more comfortable with the machine.
Espresso basics and variations
- Single espresso: 2 scoops (as TIP suggests), fine grind, 20–30 second extraction depending on dose and grind.
- Double espresso: 3 scoops, aim for a balanced 25–35 second extraction for a fuller body.
- Iced latte (cold extraction): Use the cold extraction mode to produce a concentrated espresso, pour over ice, add cold milk and sweetener as desired.
Routine Maintenance Schedule I Followed
I kept a simple schedule that made maintenance manageable and helped the machine perform consistently. Routine care prevents many of the issues I encountered in the earliest days.
My maintenance timeline
- After every use: purge the steam wand and wipe down the group head.
- Daily: empty and rinse the drip tray and portafilter baskets.
- Weekly: remove and clean the water reservoir and soak removable parts.
- Monthly: check for scale and descale as needed depending on water hardness.
Comparing the Machine to Alternatives in My Experience
While I didn’t run a side-by-side with every model on the market, this machine sits in a pragmatic niche for me between basic pump machines and full prosumer gear. It provides visual and manual tools—like the bottomless portafilter and steam wand—that let me improve as a home barista without demanding the heavy investment of higher-end machines.
What I valued compared to simpler machines
Compared to fully automated machines, I enjoyed the ability to control tamping and extraction while still benefiting from a fairly user-friendly interface. The cold extraction mode is a standout because many comparable machines focus only on hot drinks.
Where It Fits in My Kitchen and Lifestyle
This machine became my go-to for both morning espresso shots and afternoon iced drinks when hosted guests were over. It fits well on a medium-size counter and serves as a capable center piece for my coffee routine.
Why I kept using it daily
The balance between control and convenience kept me using it—removable reservoir for ease, a visible portafilter for learning, and a steam wand that lets me craft classic milk drinks. The cold extraction also expanded my drink repertoire for summer days.
Final Verdict
I enjoyed using the Cuisinart Espresso Bar™ Espresso Machine and found it to be a versatile option for someone wanting to learn and refine espresso-making skills at home. With practice and attention to grind, dose, and tamping—especially using the bottomless portafilter as visual feedback—I achieved consistently satisfying results for both hot and cold drinks.
Parting recommendation
If you’re willing to invest a little learning time and want features like bottomless extraction, cold brew-style extraction, and a manual steam wand, this machine is an excellent, approachable choice. Follow the practical tips I outlined—particularly the TIP about grind and dosing—and you’ll get the best experience from this unit.
Disclosure: As an Amazon Associate, I earn from qualifying purchases.